


Finding the Right Blink Motion Sensitivity Settings: Quick Setup & Optimization Tips
Blink Motion Sensitivity is a crucial feature of Blink security cameras that determines how the device detects motion and triggers recording or alerts. It plays a significant role in home security systems, ensuring that relevant events are captured while minimizing false alarms. The right motion sensitivity settings can enhance the effectiveness of your security cameras by accurately detecting movements, sending timely alerts, and ultimately providing peace of mind.
Factors Affecting Blink Motion Sensitivity
Several factors influence the Blink camera sensitivity, including environmental conditions, camera placement, lighting conditions, and the camera's sensitivity range. Understanding these factors and optimizing them can significantly improve motion detection accuracy and reliability.
Environmental Factors
Environmental conditions, such as lighting, weather, and surroundings, can impact Blink camera sensitivity. Bright daylight, low light, heavy rain, or snow can all affect how a Blink camera detects motion. For instance, bright sunlight can cause glare, while low light can reduce the camera's ability to detect movement accurately. Weather conditions like rain or snow can also cause false alerts due to the movement of raindrops or snowflakes in front of the camera.
Camera Placement
Proper camera angle and placement are essential for maximizing motion detection accuracy. Placing the camera at the correct height and angle can help avoid false alerts and ensure that the camera captures relevant movements. It's recommended to place the camera at an elevated position, angled slightly downward, to cover the desired area effectively.
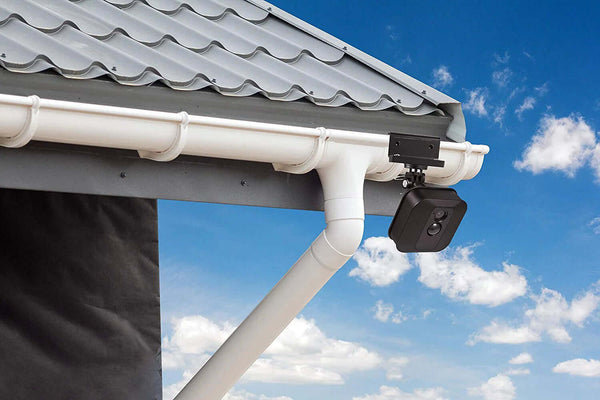
Avoid placing the camera directly facing busy streets or areas with high traffic to reduce unnecessary alerts. You may use a Blink gutter mount or a metal wall mount for Blink outdoor to install the camera in an optimal location--not too high to miss the mark and not too low to allow tampering.
Lighting Conditions

Lighting conditions significantly affect Blink camera sensitivity. Inadequate lighting can hinder the camera's motion detection capabilities, while excessive light can cause glare and false alerts. To improve motion detection, ensure that the area is well-lit during nighttime and avoid placing the camera in direct sunlight during the day. Using Blink floodlights can also enhance the camera's ability to detect movement in low-light conditions.
Blink Camera Sensitivity Range
Blink cameras utilize either Passive Infrared (PIR) or Pixel Difference Analysis (PDA) to detect motion. PIR sensors detect heat energy, while PDA compares changes between video frames. Both technologies are effective within a range of 7 to 19 feet (2 to 6 meters) and can respond to motion up to 30 feet (10 meters).
Blink Camera Sensitivity Settings
A Blink camera's sensitivity settings can be adjusted through the Blink app. You can customize these settings to control your camera's sensitivity to motion. A lower sensitivity setting requires larger motions to trigger alerts, while higher settings can detect even minor movements. If your Blink camera is not detecting motion, here's a full troubleshooting guide you can check out.
How to Adjust Blink Camera Sensitivity Settings
Blink cameras detect motion based on heat moving across the camera's field of view. The size of the heat source and the amount of movement both trigger a motion event. The Sensitivity setting adjusts how much input is needed to send a notification.
Adjusting Blink camera sensitivity settings allows you to tailor motion detection to your preferences and environments. Here are steps to adjust the sensitivity settings:

- Open the Blink App: Launch the Blink app on your smartphone or tablet.
- Select the Camera: Choose the camera you want to adjust from your device list.
- Access Camera Settings: Tap on the gear icon to enter the camera settings menu.
- Adjust Motion Detection Sensitivity: Find the "Motion Detection Sensitivity" option and slide the bar to increase or decrease sensitivity.
- Test and Fine-Tune: Test the camera by walking in front of the camera lens to see if it triggers as expected. Fine-tune the sensitivity level as needed.
False Alarms
False alarms can be a common issue when you enable motion detection. To reduce or eliminate false alarms, consider the following troubleshooting steps:
- Adjust Sensitivity Levels: Lowering sensitivity can help reduce false alarms triggered by minor movements.
- Reposition the Camera: Ensure the camera is not facing reflective surfaces or high-traffic areas with frequent minor movements.
- Modify Activity Zones: Use activity zones to focus on specific areas where you want to detect motion and ignore others.
Additionally, using your Blink camera's arm or disarm mode ensures you don't get unnecessary notifications. Your Blink system is disarmed by default. When armed, the cameras detect motion and send notifications. To save motion events, you need to have a storage option.
Arming Your System:
- Manual Arming: Select 'Armed' at the bottom of the home screen for the system you wish to arm. A confirmation will indicate the system is armed.
- Scheduled Arming: Configure the system to arm itself at specific times using the scheduling feature.
- Alexa Integration: Use the Blink SmartHome Alexa Skill to arm the system via voice commands.
Here's how a single camera operates when the system is armed or disarmed:

To adjust your camera's motion detection settings, tap the 'More' button on the Home Screen at the bottom-right corner of the device thumbnail, go to Device Settings, then select Motion Settings.
Disarming Your System: When the system is disarmed, cameras will not record motion events or send motion notifications. To disarm your system:
-
Tap 'Disarmed' at the bottom of the home screen. A confirmation will appear once the system is disarmed.
Customize Motion Zones
Customizing motion zones, known as Activity Zones, is an effective way to minimize false alarms and ensure your Blink camera captures relevant motion events. This feature is available for all Blink cameras and allows you to exclude specific areas within the camera's field of view that might trigger unnecessary motion alerts, such as trees or bushes moving in the wind.
Setting Up Activity Zones

To create Activity Zones, follow these steps:
- Select Camera: Open the Blink app and choose the camera you want to configure.
- Access Settings: Tap on 'More', then select 'Device Settings'.
- Navigate to Motion Zones: Go to 'Motion Settings' and tap 'Motion Zones'.
- Update Thumbnail: On the Activity Zones screen, you’ll see the most recent thumbnail of the camera’s view with a grid overlay. Tap 'Update Photo' to refresh the image for accurate settings.
- Select Zones: Tap on the rectangles you want to exclude from motion detection. Selected areas will become grayed out, indicating that motion in these areas will not trigger notifications or recordings.
For instance, if there are bushes within the view of a Blink camera that often cause unwanted motion clips, you can designate these as inactive zones.
Enhance Motion Sensitivity
If you experience sensitivity issues with low sensitivity, consider the following tips to enhance motion sensitivity:
- Increase Sensitivity Settings: Adjust the sensitivity slider to a higher setting.
- Improve Lighting Conditions: Ensure the monitored area is well-lit.
- Optimize Camera Placement: Position the camera to cover the area where increased sensitivity is needed.
Common Issues With Blink Camera Sensitivity Settings
While Blink cameras are designed to provide reliable motion detection, users may encounter issues with sensitivity settings that can affect the performance of their home security system. Here’s a look at some common problems and their solutions:
1. Too Many False Alarms
Problem: High sensitivity settings can lead to excessive notifications, as even minor movements might trigger alerts.
Solution: Adjust the sensitivity level to a lower setting to reduce the number of false alarms. You can also customize Activity Zones to exclude areas with frequent, insignificant motion (like trees or street traffic) from triggering notifications.
2. Missed Motion Events
Problem: Low sensitivity settings might cause the camera to miss significant motion, leaving gaps in surveillance.
Solution: Increase the sensitivity level to ensure the camera picks up more movement. Ensure that the camera is placed correctly and that no obstructions are blocking the field of view.
3. Inconsistent Motion Detection
Problem: Variability in motion detection might occur if the camera’s sensitivity settings are not optimized for specific environments.
Solution: Fine-tune the sensitivity settings based on the environment. For example, in a well-lit area, the camera might need higher sensitivity compared to a dimly lit area. Experiment with different settings and monitor the results to find the optimal configuration.
4. Camera Not Detecting Motion
Problem: If your camera isn’t detecting motion as expected, it might be due to incorrect sensitivity settings or environmental factors.
Solution: Verify that the sensitivity settings are appropriately adjusted and ensure that the camera’s field of view is not obstructed. Check the camera placement and lighting conditions to make sure they are optimal for motion detection.
5. Inaccurate Notifications
Problem: Receiving notifications for movements that don’t seem relevant, such as minor disturbances or non-threatening events.
Solution: Adjust the motion detection settings to a higher sensitivity if relevant movements are missed, or lower it if too many irrelevant notifications are received. Use Activity Zones to focus on specific areas of interest and filter out unwanted motion.
Read our blog here for more tips and tricks on configuring Blink outdoor camera settings.
FAQ
What is best motion sensitivity for Blink?
The best motion sensitivity setting for Blink depends on your environment and needs. Generally, a medium sensitivity setting is a good starting point, which you can adjust higher or lower based on the frequency of notifications and missed detections.
Should motion detection sensitivity be high or low?
Motion detection sensitivity should be set high if you want to capture all possible motion, including minor disturbances. Set it low to avoid frequent false alarms from insignificant movements. Adjust based on your specific security needs and environment.
What is IR sensitivity on Blink camera?
IR sensitivity on a Blink camera refers to how well the camera detects motion in low-light or dark conditions using infrared (IR) technology. It affects how well the camera can capture and record motion at night or in dimly lit areas.
Leave a comment