How to Remove Google Nest Doorbell — Easy Steps for All Models
The Google Nest Doorbell is popular for its hassle-free setup, making it a great choice if you're looking to improve your home security without any fuss. However, there can be times when you need to take it down, such as when you're moving houses, switching to a different doorbell, or needing to do some repairs. While the process is relatively straightforward, doing it the right way ensures your video doorbell is unscathed.
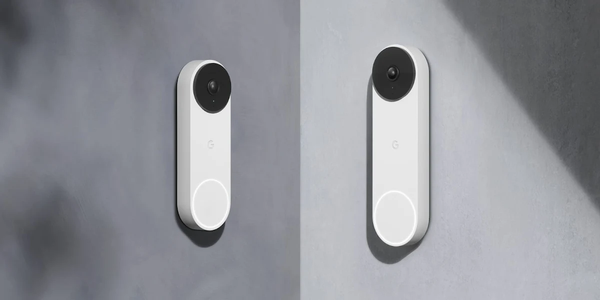
Image courtesy of Google
Considerations Before Removing Your Nest Doorbell
Before you start taking down your Nest Doorbell, there are a few things you should keep in mind. These points will help you do the job right and protect your home and your device. Let's go over them.
-
Compromising Your Overall Security: Before you proceed with removing your Nest Doorbell, it's crucial to consider the potential security implications. Removing your doorbell temporarily leaves your home vulnerable, so plan accordingly to minimize the risk. Ensure you have alternative security measures in place during the removal process, such as additional cameras or alarms.
-
Warranty and Return Policy: Review your Nest Doorbell's warranty and return policy. Removing the device incorrectly or without following the manufacturer's guidelines may void your warranty. If you plan to return or exchange the doorbell, understanding the terms and conditions can save you potential headaches later on.
-
Need for Professional Help: Some homeowners may not feel comfortable removing their Nest Doorbell on their own, especially if it involves electrical wiring. In such cases, it's advisable to seek professional assistance to ensure a safe and proper removal process.
Preparation Steps
Before you begin removing your Nest Doorbell, there are some initial preparation steps to follow whether you have the wired or wireless Nest doorbell:
Disconnect the Wiring
For wired Nest Doorbell models, it's crucial to turn off the power and disconnect the wiring safely. Locate your home's circuit breaker and switch off the power to the doorbell circuit. This step is vital to prevent any electrical accidents during removal.
Turn off the Power to the Doorbell
For battery-powered Nest Doorbells, ensure the device is powered off to avoid accidental activations while removing it.
Steps to Remove Google Nest Doorbell (battery)
If you have a battery-powered Google Nest Doorbell, follow these steps for removal:
Step 1: Find the release tool included in the box. If you don't have it, you can use a flathead screwdriver.
Step 2: Look for a hole at the top of the doorbell.
Step 3: Insert the tool or screwdriver into that hole, then press down to release the doorbell from its mount.

Step 4: Gently pull the doorbell away from the wall, holding it firmly as you do so. You may hear a slight pop as it detaches.

Steps to Remove the Nest Doorbell (wired)
If you have the Nest Doorbell (wired), follow these steps for removal:
Step 1: Turn off the power to the doorbell at the circuit breaker.
Step 2: Take the provided release tool and insert it from below, then press upward until the doorbell snaps is released from the base.

Step 3: Gently pull the doorbell away from the wall to detach it from the mounting bracket.

Steps to Remove the Nest Doorbell (Wired, 2nd Gen)
If you have the Nest Doorbell (wired, 2nd gen), follow these steps for removal:
Step 1: Take the included hex key provided with your doorbell.
Step 2: Insert the hex key into the top of your doorbell.

Step 3: Turn the hex key counterclockwise to loosen the screw securely holding the doorbell in place.
Step 4: Once the screw is loosened, carefully pull the doorbell up and away from the wall.

Steps to Remove Nest Camera

Taking your Nest Camera off its mount or base is a straightforward task. We'll walk you through the process of removing your Nest Cam Indoor, IQ Indoor, and Outdoor.
Nest Cam Indoor
The Nest Cam Indoor is mounted on a metal wall plate with a magnet. Just hold the camera and pull it to take it off the metal plate.
Nest Cam IQ Indoor
If your Nest Cam IQ Indoor is attached to a wall mount, gently twist it until the screws become loose. If it's resting on a flat surface, there's no need to do anything as the camera stand and base cannot be separated.
Nest Cam Outdoor
Like the Nest Cam Indoor, the Outdoor variant is attached to a metal plate using a magnet. To detach it, simply grasp your camera and pull it away from the plate.
How to Reset the Nest Doorbell
Resetting the Nest Doorbell or Nest Camera allows you to clear previous configurations and return it to its default state, which can be particularly helpful for troubleshooting or when you're transferring ownership of the device or switching locations.
It's important to note that factory resetting your camera will permanently erase all stored data and settings, so Google recommends trying other troubleshooting options and restarting your camera before resorting to this step.
Here's what you should be aware of after performing a factory reset on your camera or doorbell:
-
Your camera's customized settings will return to their default configurations.
-
All of your camera's event video history and snapshots will be permanently deleted, and there's no way to recover them. Please be aware that we do not maintain backups.
Important: To preserve any video footage, make sure to create video clips or timelapses and save the files to your phone or computer prior to initiating the factory reset.
-
Your camera will lose its memory of the Wi-Fi network name and password, and it will show as "Offline" in the app.
For cameras with 1st gen Nest Aware subscriptions:
If your camera has a 1st gen Nest Aware subscription and you're thinking of either removing the camera or linking it to a new account, it's vital to cancel your subscription before going ahead with the factory reset. Doing so will remove subscription-specific features like Activity Zones and erase the entire video history.
However, if you intend to keep using the camera with the same account, there's no need to cancel the subscription before proceeding with the factory reset.
Factory Reset Steps
Factory resetting steps may vary depending on your Nest device:
Resetting Nest Doorbell (wired)
Before you get started, make sure you're near your wired Nest doorbell, as you'll need to access the reset buttons. Keep in mind that a factory reset can't be done through the Nest app.
-
Press and hold the reset pin on the back (insert the release tool or paperclip into the hole near the top).
-
Simultaneously, press and hold the big doorbell button on the front.
-
Your doorbell chime will go off, and its light ring will go through a sequence of spinning blue, flashing yellow, and then turning off completely. Release the two buttons.
-
The factory reset process is finished when your camera chimes and the light ring begins to pulse blue slowly.
After the factory reset, your wired doorbell will be listed as "Offline" in the app until you remove it. To do that, open the app, navigate to Settings, click on the Nest settings icon, choose "Remove device," and confirm your selection.
If you're planning to pass your camera to someone else, you're all set. If you wish to reconnect your camera to the app, you can easily go through the camera setup process within the app again.
Resetting Nest Doorbell (wired, 2nd Gen)
-
Locate the reset pin hole on the back of your doorbell. If you have the Nest Doorbell 2nd gen (wired), you'll find the reset pin above the QR code on the back of the doorbell.
-
Insert a pin (you can use an unfolded paperclip or a thumbtack) into the reset pin hole.
-
Keep the pin inserted for the following time intervals:
-
At 10 seconds, the status light will blink yellow four times, and you'll hear a countdown tone.
-
At 12 seconds, the status light will remain steadily lit in yellow, indicating that the doorbell is initiating the factory reset. You'll also hear a confirmation tone at this point.
-
-
Release the button. Your doorbell will reset to its original factory settings.
-
After the factory reset, your doorbell will show as "Offline" in the app until you remove it.
-
To remove it from the app, open the application, access the Settings, click on the Nest settings icon, select "Remove device," and confirm your choice.
Resetting Nest Cameras
Disconnecting Your Camera from the App:
Important: Ensure that your camera is connected to Wi-Fi before you proceed with removing it from the app and performing a factory reset.
-
Open either the Home app or the Nest app on your mobile device.
-
Tap on the camera you wish to reset.
Pro Tip: To make it easier to reconfigure your camera with the same settings after the reset, jot down those settings or take a screenshot.
-
Tap on "Settings," then select "Remove device," and finally, confirm your choice.
If you plan to give your camera to someone else, you're finished. However, if you intend to reconnect your camera to the app, follow the camera setup process within the app once more.
Using the Reset Button:
-
Find the reset hole on the bottom of the camera head, situated between the power cord and the camera neck.
-
Insert a paperclip, thumbtack, or a similar object into the hole and press it down.
-
After 10 seconds, the status light will blink yellow four times, and you'll hear a countdown tone.
-
At 12 seconds, the status light will stay solid yellow, indicating that the camera is initiating the reset, and you'll hear a confirmation tone.
-
Release the button. Your camera will be restored to its factory settings.
-
After the factory reset, your camera will show as "Offline" in the app until you remove it.
Clearing Data and Unregistering the Device
To remove Nest device from Nest App:
-
Log in to the Nest app.
-
If you have multiple homes, go to the app home screen, tap "Menu," and choose the home with the product you want to remove.
-
On the app home screen, tap the "Settings" icon in the Nest settings.
-
Select the product you wish to remove.
-
For Guard, Detect, and Tag, click on "Security," and then select the product you want to remove.
-
Scroll down and pick "Remove [product name]."
-
You'll receive a confirmation prompt to confirm your choice.
-
Proceed with a factory reset of your Nest product.
Removing the Device From Your Home Network
When you decide to remove a device from a home in the Google Home app, here's what you can expect:
-
The device will be disconnected from all members within the home in the Google Home app.
-
The device will be unlinked from your Google Account.
-
Any data linked to this device, like video history, will be deleted. Please note that certain fundamental device data may still be associated with the home.
To initiate this process, follow these steps in the Google Home app:
-
Open the Google Home app.
-
Tap on "Favorites" or "Devices."
-
Tap on "Settings," then "Remove device," and confirm the removal.
FAQ
How do I remove the Google Nest doorbell without the tool?
If you don't have the release tool, Google Nest advises using a flathead screwdriver for the Google Nest Doorbell (Battery) by putting it into the hole at the top, or using a paperclip for the Nest Doorbell (Wired) by inserting it into the hole at the bottom.
How do I remove my Nest doorbell from another account?
If your Nest Doorbell is still connected to another account, perform a factory reset to wipe all personal data from the device.
How do I remount my Nest doorbell?
To remount your Nest doorbell, simply reattach it to the wall or surface using the provided mounting hardware.


Leave a comment