Blink Live View Not Working: Troubleshooting Guide
Home monitoring has never been the same since the entry of smart cameras. From having to wire boxy CCTVs to a receiving monitor (which, by the way, has to be on 24/7), smart cameras gave homeowners the liberty to position them virtually anywhere and have the central control system right in their smartphones. It also allowed for more convenient surveillance, as smart security systems have a livestream feature available at the palm of their hands.
In the case of Blink cameras, the Live View feature enables users access to real-time video footage and audio recordings within the Blink Home Monitor app. This feature is crucial for homeowners who want to check on their property whenever they need to, whether they're away on vacation or simply in another room. However, there may be times when Blink camera users might encounter issues with it, which could compromise their entire security system.
Common Live View Issues on Blink Cameras
Several possible reasons can cause Blink camera live view issues, often revolving around network connectivity and device functionality. Whether it's a glitch in the system, signal interference, or power-related problems, troubleshooting these issues promptly is crucial for maintaining the effectiveness of your home security surveillance.
Power Issues
Power supply issues and low battery capacity in wireless Blink camera models may affect their performance and Live View functionality. These issues can disrupt the continuous monitoring of your property and compromise home security.
Ensuring a stable power source is crucial for the uninterrupted operation of wireless Blink cameras. Whether through battery replacement or recharging, maintaining sufficient power levels is essential. Low battery capacity can result in intermittent connectivity issues and unreliable Live View access.
Poor Signal Strength
One of the most common challenges faced by Blink camera users is poor signal strength, which can significantly impact the reliability of Live View functionality and overall performance. Weak Wi-Fi signals between the camera and the router or Sync Module can lead to frequent disconnections, video buffering, or even complete loss of connectivity.
Poor signal strength often results from factors such as:
-
Distance from Router: The farther the Blink camera is from the router or Sync Module, the weaker the Wi-Fi signal strength becomes. This distance can be exacerbated by physical obstacles like walls, floors, or other electronic devices that interfere with the signal.
-
Interference: Wireless signals can be disrupted by interference from neighboring Wi-Fi networks, electronic appliances, or even environmental factors like heavy rainfall or dense foliage.
-
Router Settings: Incorrect router settings or outdated firmware can also contribute to poor signal strength. Suboptimal channel selection, signal frequency, or Wi-Fi range settings can affect the quality of the connection.
Sync Module Issues

For most Blink cameras, a Sync Module is needed to access Live View. In the case of the Blink Video Doorbell, Live View and two way audio can be accessed even without the module by tapping the notification within 60 seconds of it being pressed or capturing motion.
One common indicator of Sync Module issues is the status LED indicator light. A solid red light on the Blink camera or Sync Module typically signals a WiFi connection problem, indicating the need for troubleshooting. Pay attention to the WiFi indicator on the app and note that sufficient signal strength is at least two bars. One or no bars may signify poor signal strength, which can impact Live View functionality.
Server Outage

Your Blink camera and Sync Module rely on cloud-based servers for their operation. If these servers experience an outage, it can disrupt the functioning of Blink devices. When the servers are down, Blink cameras may stop working altogether and you may not be able to access Live View or use other features. You might also see a message saying "Blink System is busy" when there's a server issue. This indicates that the system can't connect to the servers properly.
Event Response Mode in Blink Video Doorbell
Event Response Mode is a feature available in Blink Video Doorbell, which changes how Live View can be accessed. When this mode is active, the Live View play button may not be visible in the Blink app. Instead, you can access Live View only through notifications sent to your mobile device when motion events are detected.
Troubleshooting Steps for Blink Live View Not Working
If you encounter any issues with your Blink camera's live view functionality, here are some troubleshooting tips you can try:
Check Camera Placement and Connections

Ensuring proper camera placement and secure connections is crucial for optimal performance of your Blink camera. Here's how to proceed:
-
Ensure Proper Placement:
- Position the camera at the desired location with a clear line of sight to the area you want to monitor.
- Avoid placing the camera too high or too low, as it may affect the angle of view and motion detection capabilities.
- Ensure the camera is protected from direct sunlight, extreme weather conditions, and potential tampering.
-
Verify Physical Connections:
- Check the power source: Ensure the camera is connected to a reliable power source, whether it's through a USB power adapter for wired cameras or fully charged batteries for wireless models.
- Inspect cables: Examine the power cable and any other connected cables for signs of damage or loose connections. Ensure they are securely plugged into the camera and power source.
- For wired cameras: Confirm that the Ethernet cable (if applicable) is securely connected to both the camera and the router or Sync Module.
-
Address Potential Obstructions or Interference:
- Remove obstacles: Clear any objects or debris that may obstruct the camera's view or interfere with its operation, such as branches, leaves, or spider webs.
- Minimize interference: Position the camera away from electronic devices that emit radio frequencies, such as microwaves or cordless phones, as they can disrupt Wi-Fi signals.
- Adjust antenna position: If your camera has an adjustable antenna, experiment with different positions to optimize signal reception and minimize interference.
Check the Power Source of Your Blink Device

Ensuring a dependable power source is crucial for the proper operation of your Blink device, whether it's powered by batteries or wired. Here's how to check the power source effectively:
-
Battery Verification for Battery-Powered Cameras:
- If your Blink camera is battery-powered, ensure it's using the recommended AA 1.5V Lithium batteries. These batteries offer sufficient power for optimal performance.
- Check the battery compartment of your Blink camera to confirm the battery type installed. If alkaline or rechargeable batteries are present, consider replacing them with lithium batteries.
-
Battery Level Inspection:
- Assess the battery level of your Blink camera to ensure it's adequately charged. Low battery levels can affect the camera's Live View or video recording capabilities.
- In the Blink app, navigate to the device settings to view the battery status. Alternatively, check the battery indicator light on the device itself, if available.
-
Battery Replacement:
- If your Blink camera is powered by dead batteries, replace them with fully charged lithium batteries to restore functionality.
- Follow the manufacturer's instructions for battery replacement, ensuring proper insertion and alignment.
-
Verification for Wired Cameras:
- For wired Blink cameras, ensure the camera is securely connected to a power source, such as a power outlet or PoE (Power over Ethernet) injector.
- Check the power cable and connections to ensure there are no loose connections or damage.
-
Addressing Power Issues:
- If using a wired Blink camera, check the power source to ensure it's functioning correctly. Consider testing the power outlet with another device to verify functionality.
- For battery-powered cameras, consider using high-quality lithium batteries or rechargeable lithium batteries designed for extended electronic device use.
Check Your Wi-Fi Network
Ensuring a stable Wi-Fi connection is crucial for the proper functioning of your Blink camera's Live View feature. Here's how to check and address Wi-Fi network issues effectively: Checking Wi-Fi Signal Strength and Stability: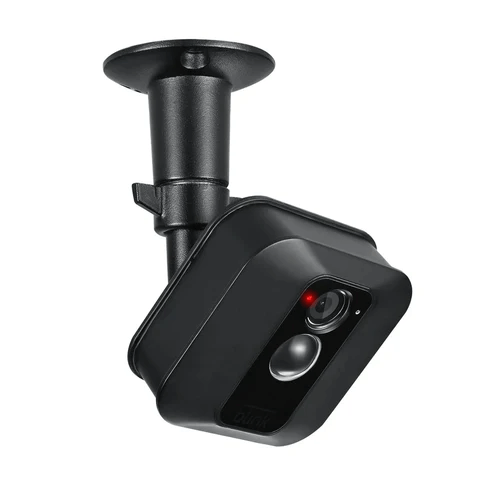
-
You may notice your Blink camera flashing red light when there's poor WiFi connection.
-
Open the Blink app on your mobile device and navigate to the camera settings.
-
Tap on the settings icon to access the camera settings tab, then scroll down to the network section.
-
Check the "camera to Wi-Fi" and "camera to Sync Module" statuses to confirm the connection status and signal strength.
-
Ideally, there should be at least two bars on the Wi-Fi indicator. One or no bars indicate poor signal strength, which may be insufficient to support Live View.
Addressing Wi-Fi Network Issues:
-
If you notice poor signal strength or connectivity issues, try moving the Blink camera closer to your Wi-Fi router or Sync Module to improve signal reception.
-
Consider relocating your Wi-Fi router to a central location within your home to ensure better coverage throughout the premises. Ensure that the camera lens is not being obstructed by objects.
-
Avoid placing the Wi-Fi router near electronic devices that may cause interference, such as microwaves, cordless phones, or Bluetooth devices.
-
Perform a speed test on your network to assess internet speed and stability. If the results indicate slow or unstable connections, contact your internet service provider (ISP) to address potential throttling or other network issues.
Router Settings and Configurations for Blink Compatibility:
-
Ensure that your router's settings and configurations are compatible with Blink devices.
-
Check for firmware updates for your router and apply them if available, as outdated firmware may cause compatibility issues.
-
Verify that your router supports the necessary Wi-Fi standards (e.g., 802.11 b/g/n) and is configured to operate on a non-overlapping Wi-Fi channel to minimize interference.
-
For advanced users, consider configuring Quality of Service (QoS) settings on your router to prioritize traffic for Blink devices, ensuring a consistent and reliable connection.
Update Blink App and Firmware
Keeping your Blink mobile app and camera firmware up to date is essential for ensuring optimal performance and accessing the latest features. Here's how to update the Blink mobile app and firmware:
-
Updating the Blink Mobile App:
- Before checking for app updates, clear the app cache on your device to free up memory and refresh the app. This can help resolve any performance issues or glitches.
- Open your device's respective app store (e.g., Apple App Store for iOS devices, Google Play Store for Android devices).
- Search for the Blink app in the app store and check for any available updates. If an update is available, tap on the "Update" button to install the latest version of the app.
-
Updating Camera Firmware:
- Launch the Blink app on your smartphone or tablet.
- Select the camera that you want to update from the list of devices.
- Tap on the settings icon (typically represented by a gear or cogwheel icon).
- In the settings menu, select "Device Information."
- If a firmware update is available for your camera, you will see an option to update the firmware. Follow the on-screen instructions to initiate and complete the firmware update process.
- New firmware updates can fix bugs, improve camera performance, and introduce new features, so it's essential to keep your camera's firmware up to date.
-
Compatibility Between App Version and Camera Firmware:
- It's crucial to ensure compatibility between the version of the Blink app installed on your device and the firmware version installed on your camera.
- Incompatibility between the app version and camera firmware may lead to connectivity issues, feature limitations, or unexpected behavior.
- If prompted to update either the app or camera firmware, follow the instructions provided to ensure compatibility and optimal performance.
-
Confirm Settings and Test Live View:
- After updating the Blink app and camera firmware, confirm your settings within the app.
- Test the Live View feature to ensure that the updated Blink system is functioning correctly and that you can access live video feeds without any issues.
Restart and Reset Your Blink Camera and Module
Power cycling and resetting your Blink camera can help resolve various issues and restore it to a functional state. Here's how to perform a restart and factory reset:
-
Restarting the Camera
- To restart or power cycle the camera, simply unplug it from the power source or remove the batteries (if applicable).
- Wait for a few seconds, then plug the camera back in or reinsert the batteries.
- Allow the camera to power up and initialize. This process can help resolve temporary issues or glitches.
-
Performing a Factory Reset

- Factory resetting Blink camera clears its settings and restores its default configurations.
- Locate the reset button on the back of your Blink camera. It is typically a small button that may require a paperclip or similar object to press.
- Press and hold the reset button for about 10 seconds until the LED light on the front of the camera flashes red. This indicates that the reset process has begun.
- Once the LED light stops flashing, the camera has been reset to its factory settings.
-
Reset the Sync Module

- Locate the Reset Button on the back of the Sync Module. It's typically labeled and may require a small, pointed object to press.
- Press and Hold the Reset Button for approximately five seconds using a small, pointed object such as a paperclip or pen.
- After holding the reset button for five seconds, release it once the red LED on the Sync Module begins to flash.
- Upon releasing the reset button, observe the Sync Module's LED indicators. You should see a blinking blue LED followed by a solid green LED. This indicates that the Sync Module has been successfully reset and is now ready to be set up again.
FAQ
Why does live view fail on Blink?
Live view may fail due to power issues, poor Wi-Fi signal, or server outages.
How do I get my Blink camera to show live?
Ensure the camera is powered, connected to Wi-Fi, and the Blink app is up to date.
Can I view my Blink camera away from home?
Yes, you can view your Blink camera remotely through the Blink app from anywhere with an internet connection.
Do I need a Blink sync module for Live View?
Yes, a Blink sync module is required for Live View functionality as it acts as a bridge between the camera and the Blink servers. However, with the Video Doorbell, you can access Live View by tapping the motion notification when it's pressed.
Why is my Blink not showing clips?
Ensure motion detection is enabled, and your subscription plan includes cloud storage for clips.
Why is Blink Live View unavailable in Alexa app?
Integration issues or settings within the Alexa app may prevent Blink Live View access. Ensure Blink devices are properly integrated and permissions are granted.




Leave a comment